If you’re learning photography, one of the first terms you’ll hear is ISO. It’s a core camera setting that directly affects how bright your photos are—and how clean or grainy they look.
Understanding ISO is essential if you want consistent, professional-quality images, whether you’re shooting portraits, sports, or low-light scenes.
In this guide, you’ll learn what ISO is, how it works, and how to choose the right ISO setting for any situation.
What Is ISO?
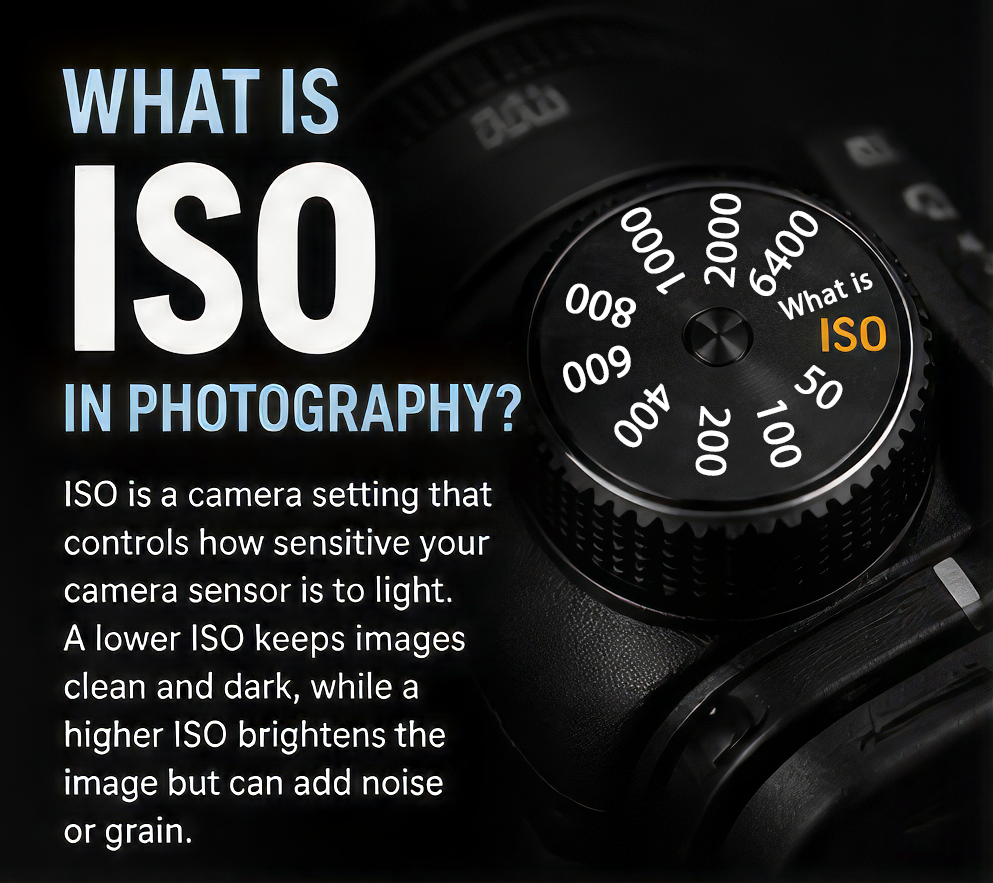
ISO is a camera setting that controls how sensitive your camera sensor is to light.
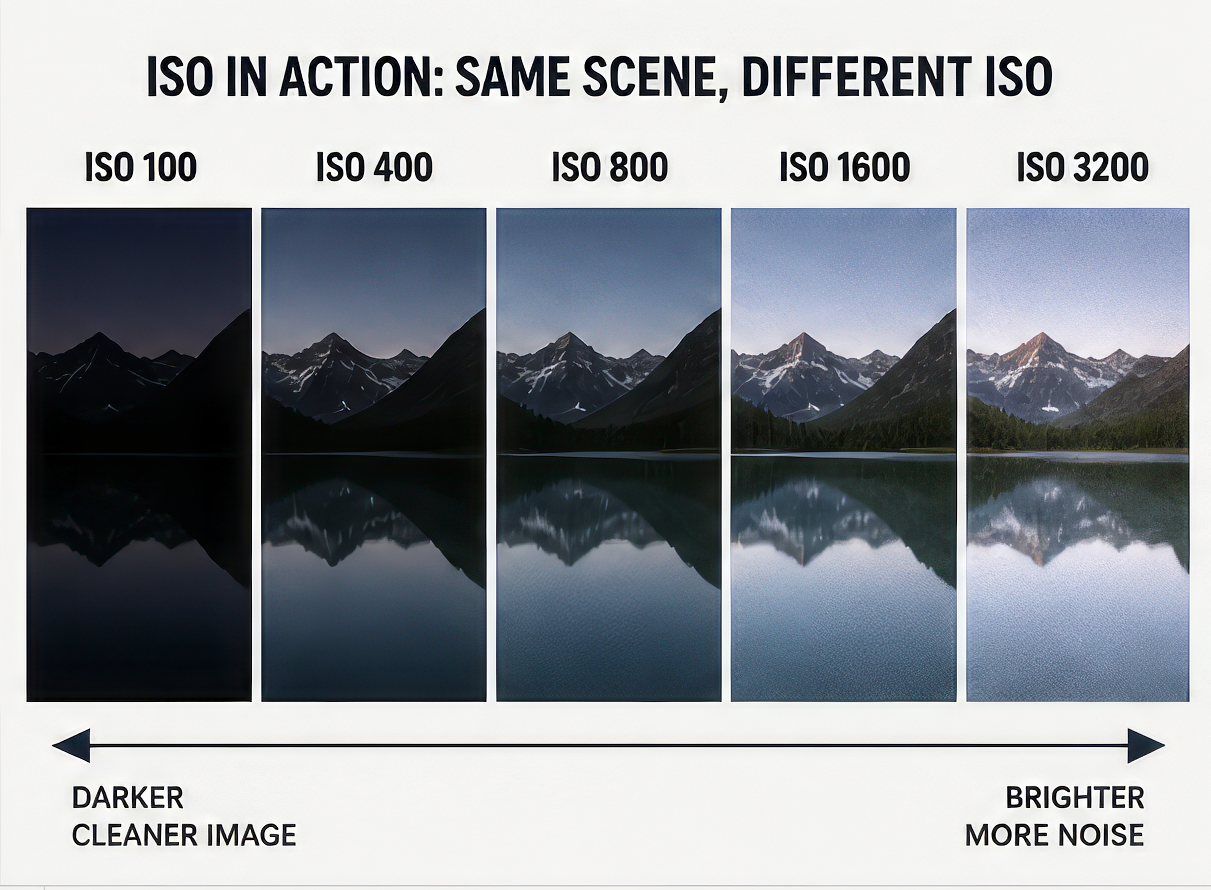
- Low ISO (100–200) = darker image, cleaner quality
- High ISO (1600+) = brighter image, more noise/grain
Unlike aperture and shutter speed, ISO doesn’t control light entering the camera—it controls how your camera processes that light.
ISO and the Exposure Triangle
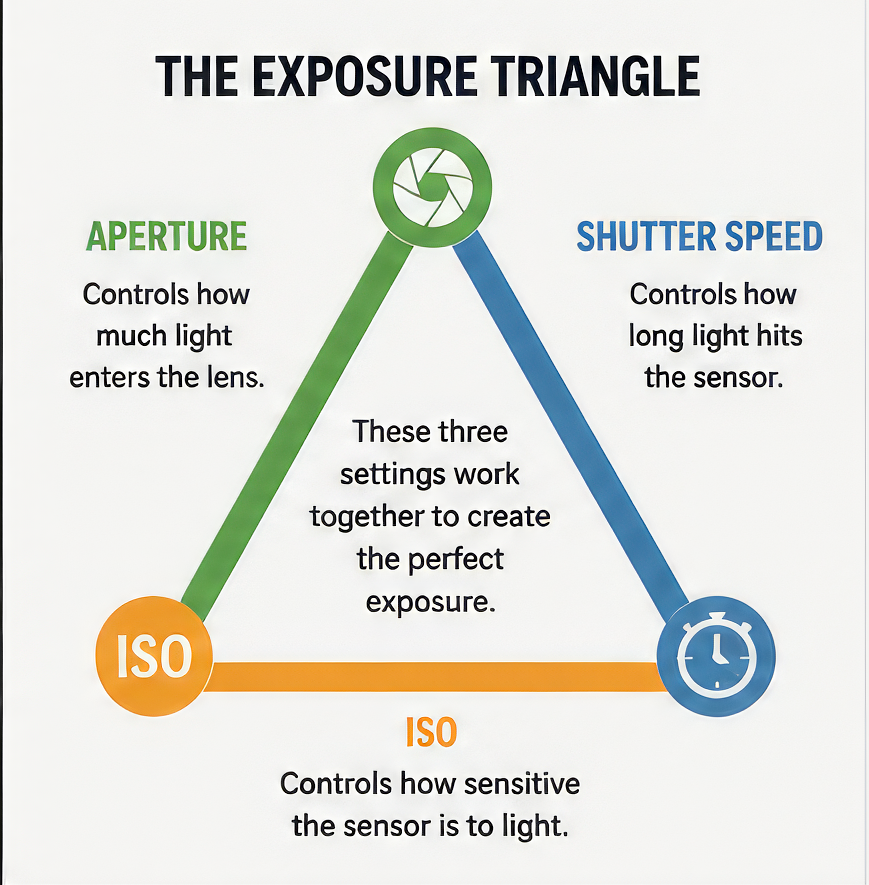
ISO is one-third of the exposure triangle, along with:
- Aperture – how much light enters your lens
- Shutter Speed – how long light hits the sensor
- ISO – how sensitive the sensor is to that light
These three settings work together. When you adjust one, you often need to adjust the others to maintain proper exposure.
Example:
If you increase your shutter speed to freeze action, your image may get darker—so you raise ISO to compensate.
Why ISO Matters in Real Photography
ISO becomes especially important in real-world situations where lighting isn’t ideal.
Low-Light Photography
Shooting indoors, at events, or during evening sessions often requires a higher ISO to avoid underexposed images.
Sports & Action Photography
Fast shutter speeds are critical for freezing motion. Raising ISO allows you to maintain that speed without darkening your image.
Weddings & Events
Lighting conditions change constantly. ISO helps you adapt quickly without sacrificing key moments.
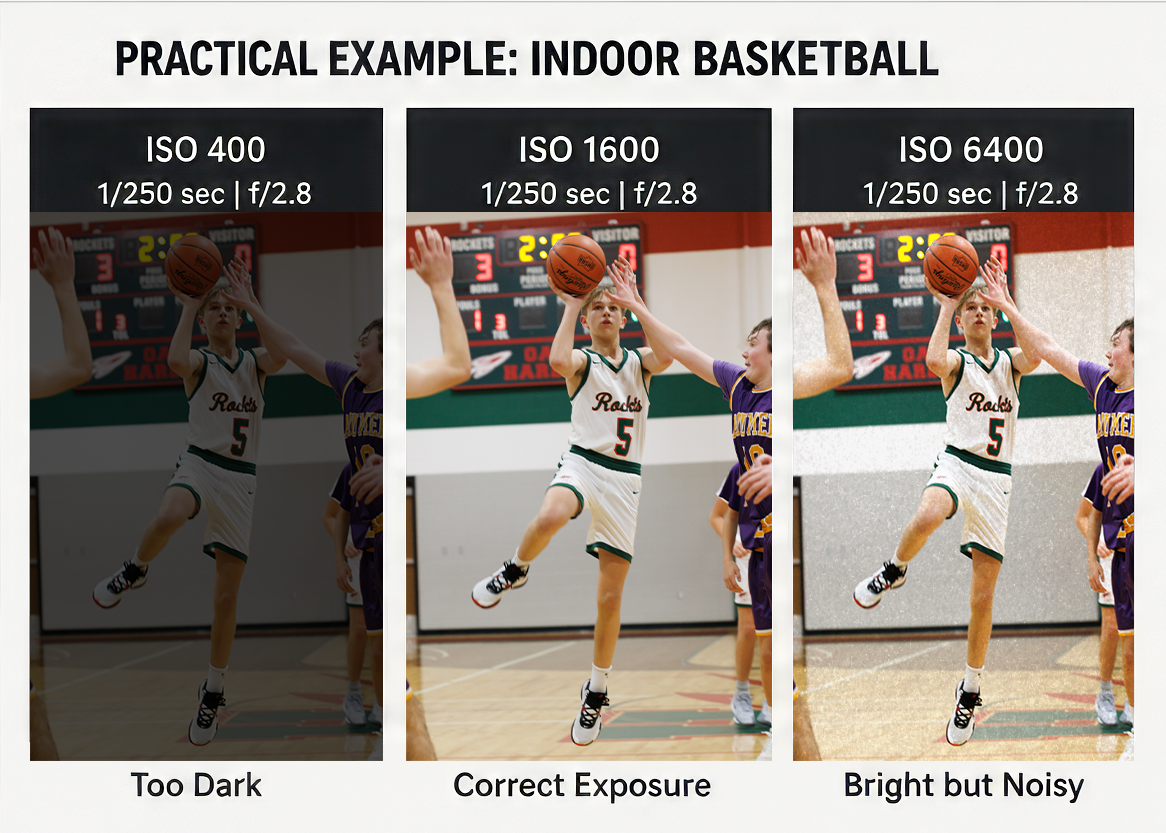
For example, when photographing a basketball game in a dim gym, you might need ISO 3200 or higher to keep your shutter speed fast enough to freeze the action.
ISO and Image Quality (Noise Explained)
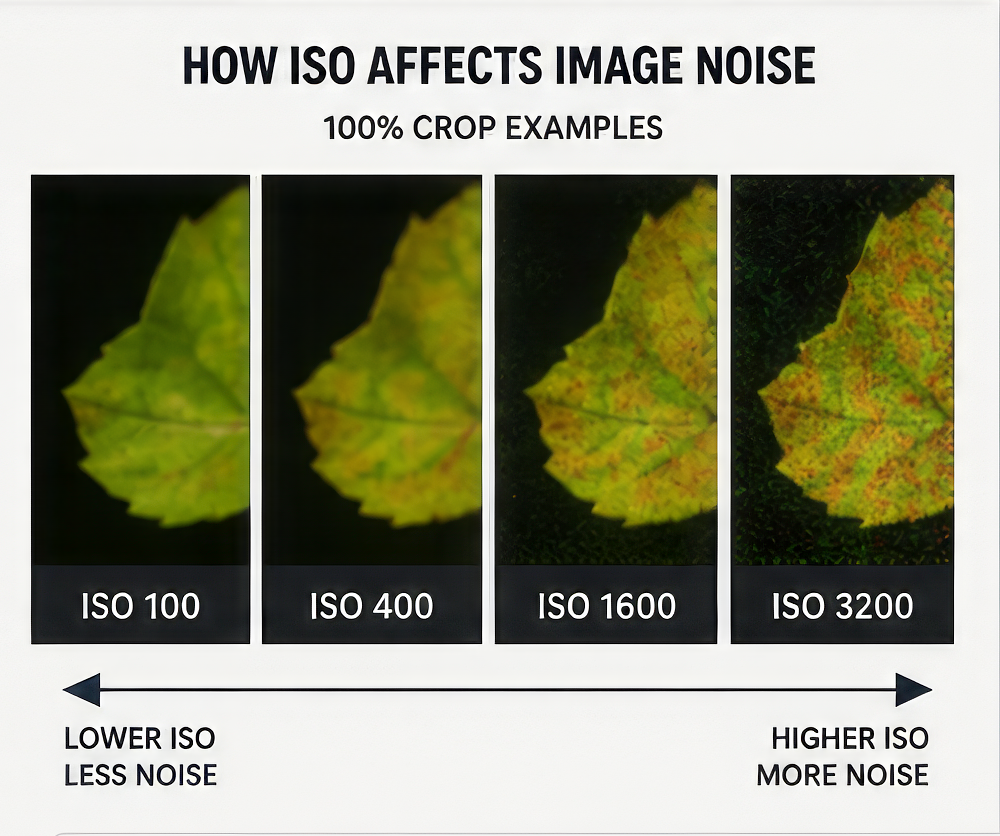
The biggest tradeoff with ISO is image noise.
As ISO increases:
- You’ll see more grain, especially in shadows
- Fine details may become softer
- Colors can lose accuracy
Modern cameras handle high ISO much better than older models, but the principle still applies:
👉 Use the lowest ISO possible—unless you need more light.
A slightly noisy photo is almost always better than a blurry one.
Best ISO Settings for Common Situations
Here are practical ISO starting points you can use in the field:
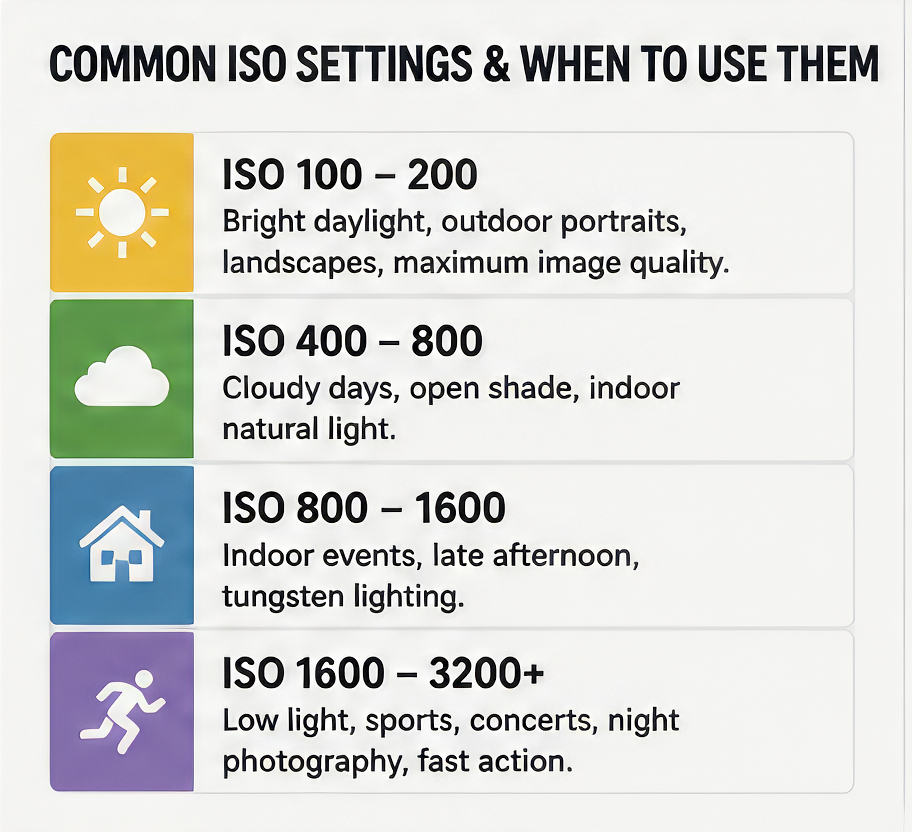
- ISO 100–200 – Bright daylight, outdoor portraits, landscapes
- ISO 400–800 – Cloudy days, indoor natural light
- ISO 800–1600 – Indoor sessions, late afternoon, shaded areas
- ISO 1600–3200+ – Low light, sports, events, night photography
These aren’t strict rules—but they’ll help you make fast, confident decisions when shooting.
Pro Tips for Using ISO
- Start low and increase only when needed
- Prioritize shutter speed for motion (especially sports and kids)
- Don’t fear higher ISO on modern cameras—it’s better than missing the shot
- Watch your shadows—noise shows up there first
- Use noise reduction in editing when necessary
How ISO Fits Into Your Photography Style
As you gain experience, ISO becomes less about “rules” and more about intent.
For example:
- Clean, polished senior portraits → keep ISO low
- High-energy sports shots → prioritize shutter speed, raise ISO
- Moody indoor sessions → embrace a little grain for atmosphere
Learning how to balance ISO with aperture and shutter speed is what separates beginners from confident photographers.
Final Thoughts
ISO isn’t just a technical setting—it’s a creative and practical tool.
When you understand how ISO affects brightness, noise, and overall image quality, you’ll be able to adapt to any lighting situation and capture better images consistently.
The goal isn’t always the lowest ISO—it’s the right ISO for the moment.

Need Help With Your Photography?
If you’re in Northern Ohio and want professional photos—whether it’s senior portraits, sports, or family sessions—check out my work at:
👉 www.TravisBrooksPhotography.com
Or follow along on YouTube for behind-the-scenes content and photography tips:
👉 Youtube.com/TravisBrooksPhoto